
NOTE: Seller Labs estimates Cost of Goods Sold (COGS) as 25% of the price unless COGS is provided by you.
Tip:
-
Do not include any currency symbols with your COGS in the spreadsheet, as this will cause the upload to fail.
Step 1: From the hamburger menu in the top-left corner, hover over Profit Genius and click Bulk Update Products.
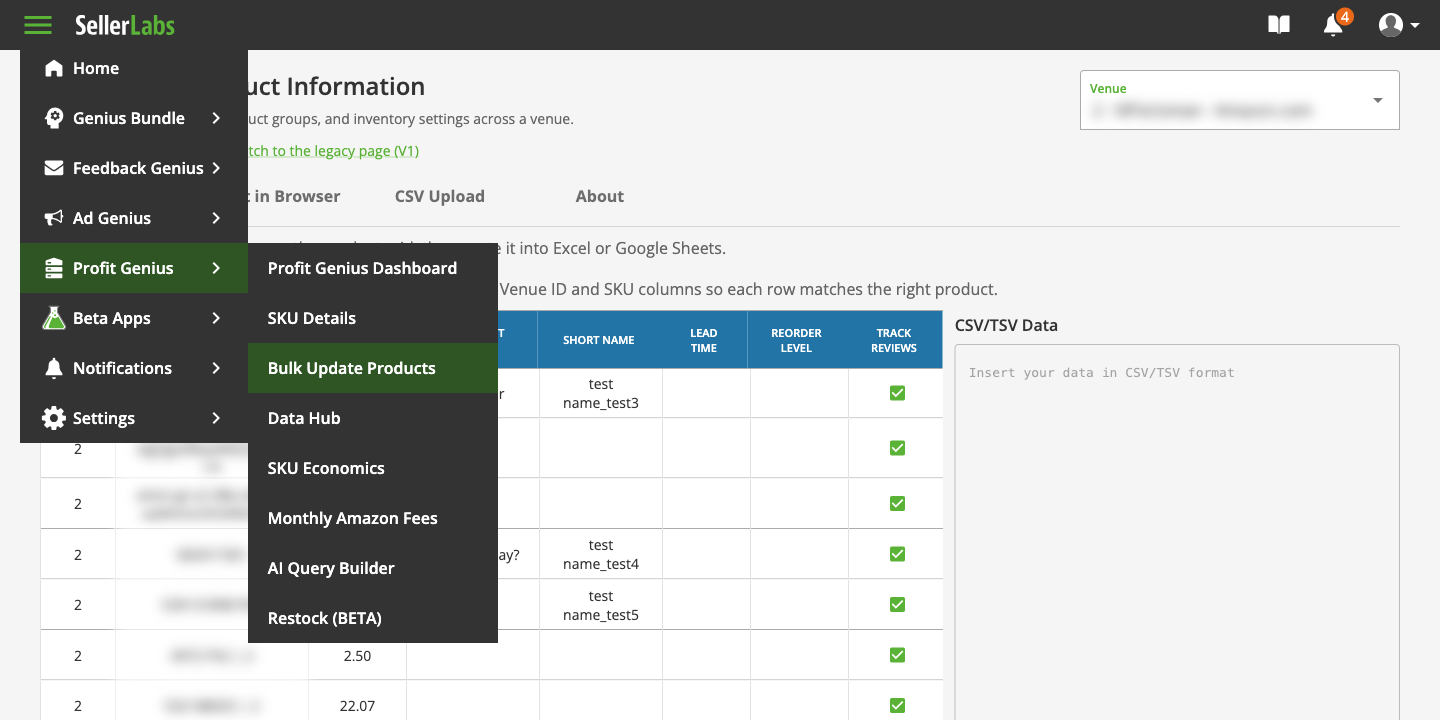
Step 2: Choose the Venue you want to edit from the dropdown in the top-right corner — all changes apply to that venue. On this page you can update COGS, SL Product Group, Short Name, Lead Time, Reorder Level and Track Reviews. For more information about these values, please refer to the Product Catalog Glossary of Terms.
You have four ways to update your data. On this page you can use Copy-Paste, Edit in Browser or CSV Upload, or you can work in Claude through the Seller Labs Amazon MCP. Pick whichever fits how you like to work. If you use this page, keep the Venue ID and SKU columns intact so each row stays matched to the right product.
Copy-Paste
Best if you want to bulk-edit your COGS in Excel or Google Sheets and paste the results back.
1. Click the Copy to Clipboard button to copy the full product grid.
2. Paste it into your spreadsheet, then set your COGS values (and any other columns you need).
3. Copy the whole grid back, paste it into the CSV/TSV Data box on the right, and click the Update button.
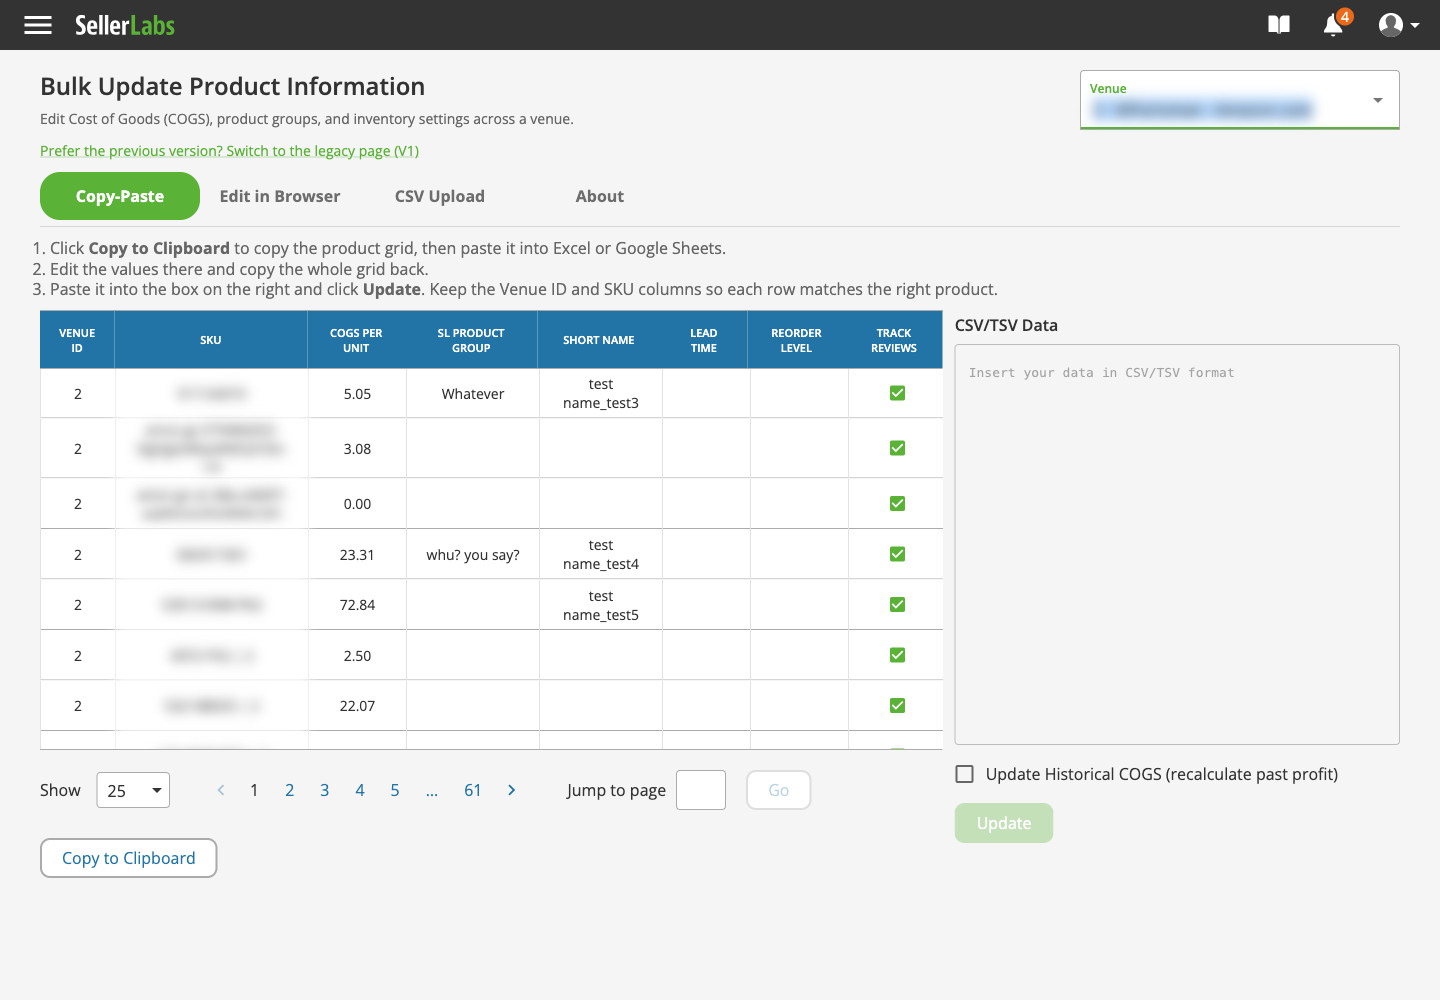
In a few moments, the updated data will be shown in the grid. You are all set!
Edit in Browser
Best for quickly changing the COGS on a few products without leaving the page.
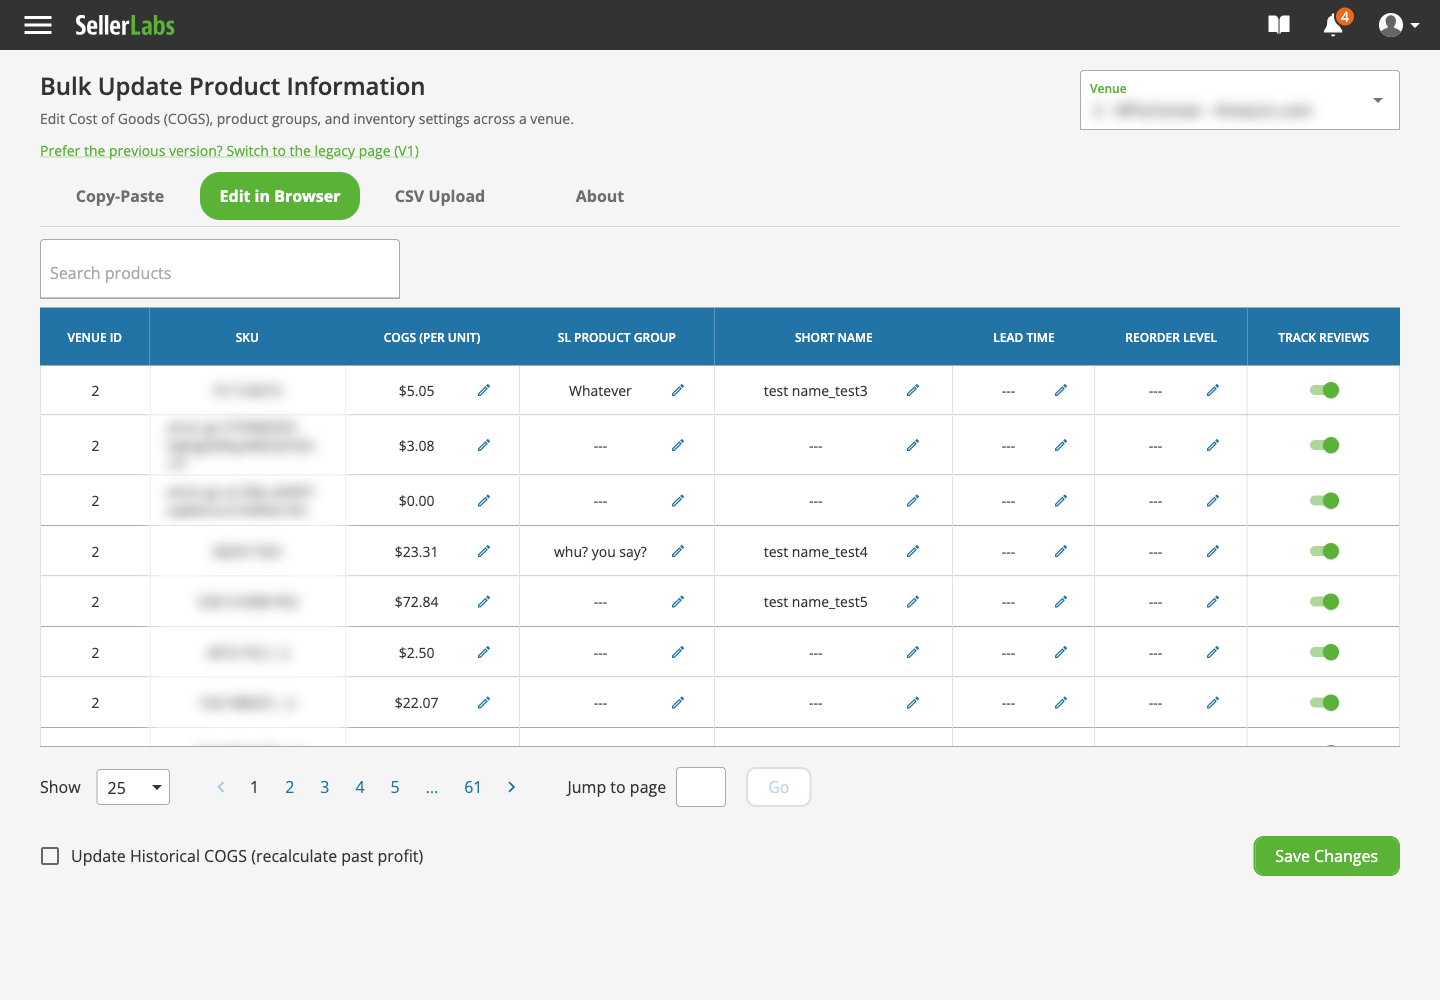
1. Use the Search products box to find a SKU, short name, or product group.
2. Click the pencil icon next to the value you want to change — for example, the COGS (Per Unit) cell — type the new value, and click the check to confirm.
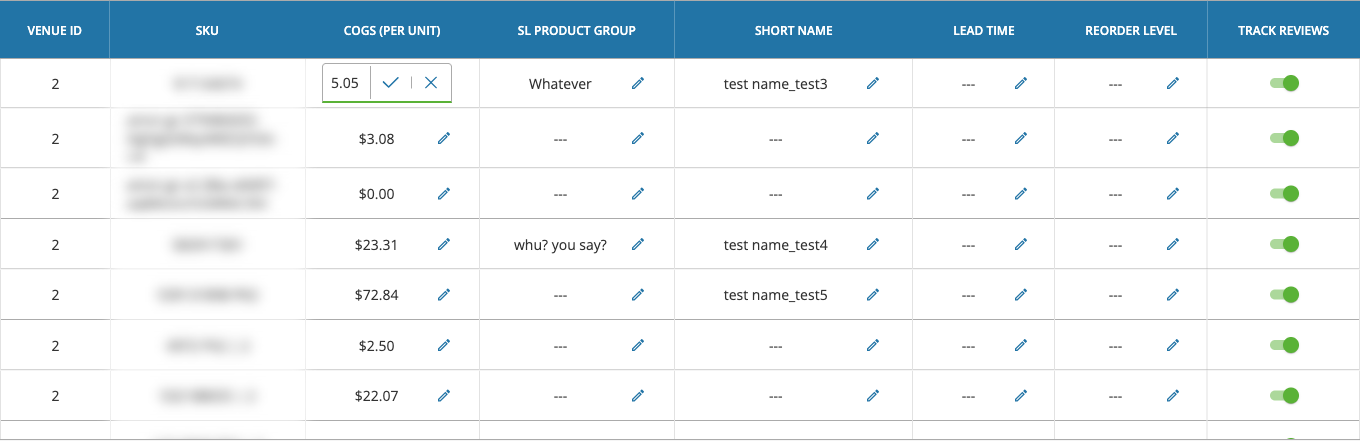
3. When you have made all your edits, click the Save Changes button.
CSV Upload
Best for large catalogs or when you would rather work from a downloaded file.
1. Click the Download CSV Template button and enter your product information, including your COGS values. Save the file to your computer.
2. Click the Choose File button and select your edited CSV.
3. Click the Upload file button and wait for it to finish before leaving the page. Once it is done, you are all set!

How blank cells behave: upload the full template you downloaded — the upload only touches the SKUs in your file. For Lead Time and SL Product Group, leaving the column out of your file keeps the existing value, but including the column with a blank cell will clear it. COGS, Short Name, Track Reviews, and Reorder Level are left unchanged when blank.
Recalculating past profit
On all three tabs you will see an Update Historical COGS (recalculate past profit) checkbox. Leave it unchecked to apply your new COGS going forward only, or check it to also recalculate your past profit (up to the last 3 years) using the new COGS — useful when you are correcting values that were wrong historically.
This checkbox isn’t available when you update through the Seller Labs Amazon MCP — updates made there always recalculate past profit.
Prefer the previous version? You can switch to the legacy page (V1) during the transition.
Through the Seller Labs Amazon MCP
Best if you already use Claude with the Seller Labs Amazon MCP and would rather update costs by chatting than work on the Bulk Update Products page.
Before you start
-
You need MCP Genius or the Genius Bundle. Both include the Seller Labs Amazon MCP.
-
Claude must already be connected to the Seller Labs Amazon MCP. If it isn’t yet, follow Connecting the Seller Labs Amazon MCP to Claude first.
What you can update: COGS, Lead Time and SL Product Group. To change Short Name, Reorder Level or Track Reviews, use the Bulk Update Products page above.
1. Open a new chat in Claude with the Seller Labs Amazon MCP connected.
2. Ask Claude for your current values. For example:
“Show me the current COGS for all my products in my [venue name] venue.”
Replace [venue name] with the venue you want to update, as it appears in Seller Labs. This works for any of your venues. Claude lists your SKUs with their current COGS, Lead Time and SL Product Group. Changes are made one venue at a time.
3. Tell Claude what to change. You can type the changes:
“Set the COGS for SKU ABC-123 to 4.50 and SKU ABC-456 to 7.20.”
Or attach a spreadsheet with a SKU column and a cost column:
“Update the COGS for my [venue name] venue using the costs in this file.”
4. Review the preview. Claude doesn’t save anything yet. First it shows you what will change: how many SKUs, which fields, and any SKUs it couldn’t find in that venue. SKUs it can’t find are skipped.
5. Approve the changes. If the preview looks right, reply “Yes, apply these changes.” If something’s off, tell Claude what to fix and it will show you a new preview.
6. Check the result. Ask Claude to show your values again, or open the Bulk Update Products page.
Good to know
-
Past profit is always recalculated. When you change COGS through the Seller Labs Amazon MCP, Seller Labs also recalculates past profit for those SKUs with the new cost, going back up to 3 years. You can’t apply a new cost going forward only this way. If that’s what you want, use the Bulk Update Products page and leave Update Historical COGS unchecked.
-
Selling the same SKU in more than one venue? Update its COGS on the Bulk Update Products page above with Update Historical COGS unchecked.
-
Some profit reports update later. They can take until your next Amazon settlement to show the recalculated past profit.
-
Only the fields you mention change. If you ask Claude to update COGS, your Lead Time and SL Product Group stay as they are.
-
Clearing values: you can ask Claude to clear Lead Time or SL Product Group. COGS can’t be cleared: Claude can set a new cost, but it can’t remove one.
-
Nothing changes without your OK. Claude only saves changes after you approve the preview.
Need help? Our support team is happy to assist you! 🙂
-
Connect via the in-app chat icon, located in the bottom-right of your screen while logged into any of our apps
-
Search the Knowledge Base to see if your question has already been answered
-
Make an appointment with us for more direct support
*No Credit Card Needed